
Introduction
|
Build Orders
Lets begin with initial build orders(BO) as they make or break a game.Tech builds are where your enemy dashes to Tier 2 or if he's feeling bold, Tier 3, generally by surviving with a lone commander and not making any squads apart from the initial cappers in T1.The enemy's intention is to clobber your lower tier weak infantry mass with higher tier powerful units.A popular example would be grey knights leading the charge together with SM commanders taking out a few basic squads from any faction when executed correctly.Its best to have a build set to lay down the attacking foundations for each particular map, match up.Acquiring a repertoire of builds gives you a range of tactical plans to surprise and take the lead against your opponent.
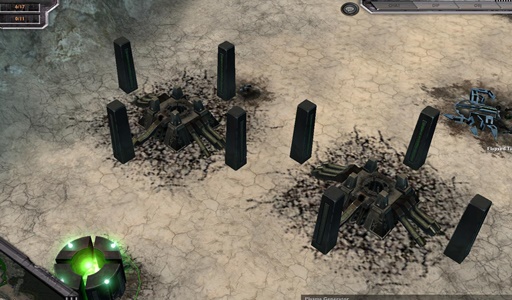
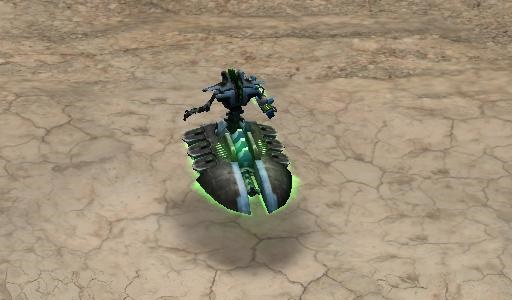
First five scarabs out builds power generators.
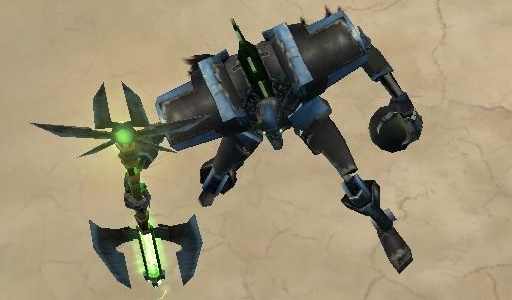
Necron Lord built before NWs
The Necron Lord(NL) can role-play as a powerful scout by exploring the land ahead giving you intel on advancing ground troops movement.The NL can be used as a harasser by instantly teleporting to strategic points to delay cappers from capturing them.Or the NL can port over to the opponents base to destroy a listening post or a generator.The NL's staff or sceptre whatever you may call it, does greater damage to enemy commanders or squads when used in melee compared to its weaker ranged damage.
Scarabs out before NL or NWs
Instead of building gens or capping LPs,scarabs can straightaway harass the opponents base by decapping their points thus disrupting their smooth BO.They could also build offensive turrets near LPs to prevent the opponent from capturing them or even within the range of barracks to try & destroy them if you're feeling lucky.
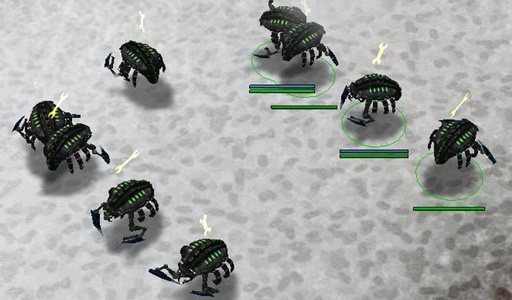
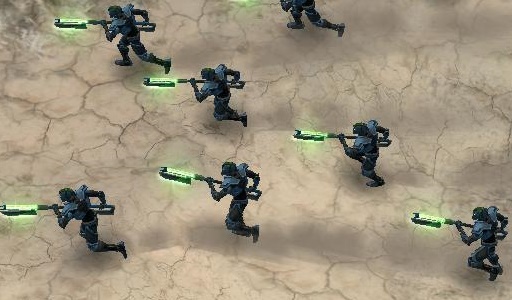
Queue up NWs by the monoload
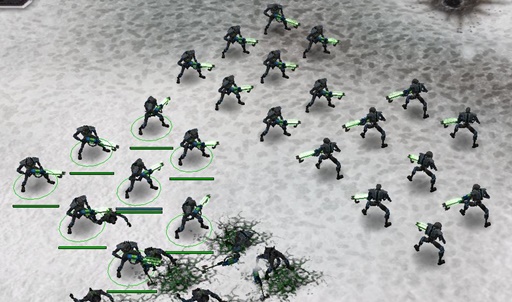
The "cronning" plan is to have a NWs crowd consisting of 3 or more squads to set up the deathmarch towards your enemies base to overwhelm your opponent with sheer force of numbers.The Force Commander(FC) or Chaos Lord can still do considerable damage to a NW squad in melee.Its hard to kill a hero on the first encounter with a NW squad but you can still chip away at the commander's health bar.You can always return a moment later & finish off the hero with reinforcements while the hero's health is slowly recovering.
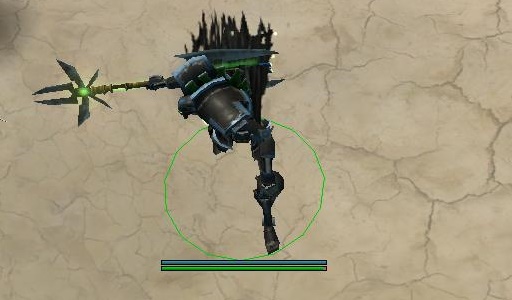
Scarab builds an incomplete turret
Building a turret with a slither left on its bar can defend against a forceful opponent during the first minute especially on smaller maps like Blood River.Especially against sm scouts rushing in,just finish off building the turret in a second to make them flee.
Remember you can also manually target individual enemy squads with the turret.If your opponent is teching instead, you can then simply delete the turret & get the power resource back to build towards another gen.Try to place your turret in the best location wherever possible ie it should ideally be covering a LP or 2 to prevent opponents capturing your LPs early on as well as protecting the gens & scarabs on which your scarabs are working on.
Scarab builds SC after a few gens
Once the Summoning Core(SC) is up you can go for Wraiths or Flayed ones(FOs) to help out your NWs in combat.The SC teleport ability can be used to retreat low health NWs out of trouble or to an advanced LP quickly.Also you can upgrade NWs health to make them more durable as well more damaging in combat.
An early SC is urgently required if you see Tau or Eldar planting their required buildings to advance to t2.You have to keep pace with your opponent's tiering.In Necron mirror match ups, its a race to build a SC ASAP.A Necron mirror tactic is to mass a few squads of FOs.Send a spotter scarab to the enemy's Monolith and then port them there to destroy the gens and cripple their econ.With an early SC you can now build Wraiths.Wraiths can stop Tau's map domination by hunting down Tau's invisible Stealth Suits.
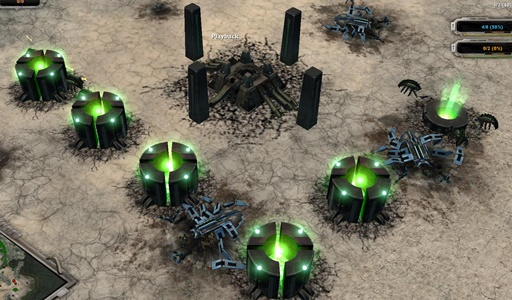
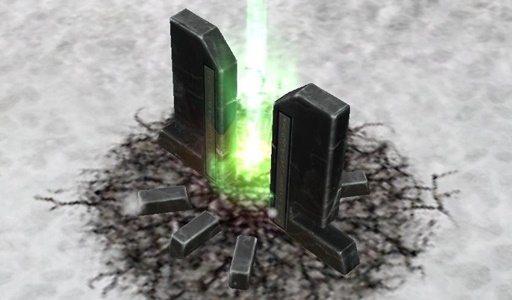
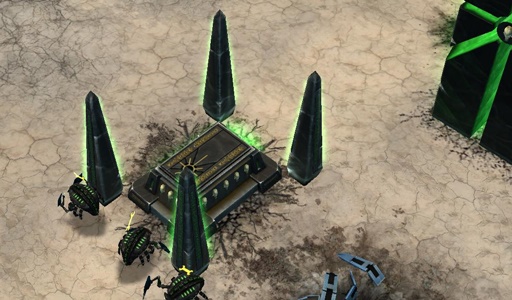
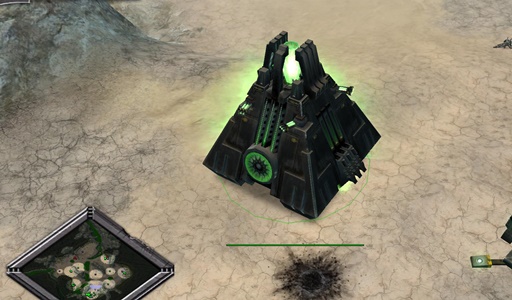
Scarab builds a 2nd monolith
A somewhat risk and reward BO as spending your starting power resource on a secondary mono instead of a power generator grid surrounding your mono will leave you struggling for every lightning strike of voltage.The ideal windows of opportunity to manufacture the spare mono is after a few gens are up or after several gens & a summoning core are completed giving you the handy option of going for T2 or waiting a bit and spending a slightly higher amount instead on another mono.
The main purpose of having two monoliths in early T1 is you have two NW barracks dedicated to producing excess NWs in a shorter amount of time.The battle tacic here is to set a waypoint to your enemy's HQ and then send unreinforced NW squads to that rally point constantly.This will keep your enemy under continous pressure defending his base and perimeter from waves of plodding NWs while you have the freedom to tier up.
Keep in mind NWs are slower to deploy from each successive squad out from the Monolith onwards.NWs build speeds are even slower when you add extra units to their squad. A 2nd Mono in late T1 or early T2 is necessary to respond to the Eldar's Bonesinger's WraithTomb spell.What this Eldar abilty does is it shuts down the manufactoring\research on the Monolith for a period as well as turrets.Having the luxury of two Monos lets you churn out Wraiths faster to tie up multiple ranged squads like Dark Reapers or Firewarriors.Scarab builds early Archive and Necron Lord
The Archive is used to upgrade the Necron Lord, making the NL arguably the most powerful hero in T1.Although Eldar's Farseer comes pretty close as the Eldar queen can literally beat any one of the faction bosses in T1 in a straight up 1v1 melee fight thanks to full usage of her default spells.So be alert if the Farseer takes a sudden beeline towards your commander and run your commander quickly away!Once the NL's abilities are expanded, he is more of a harassing threat with the right offensive spells combo,eg chronometron & lightning field.When charged the lightning field ability can surprisingly take out large chunks out of a hero's or squad's health in the fields radius.The great thing about the chronometron is it slows the enemy's movement to a crawl giving your NWs extra damage in that brief moment to fire off extra shots from their Gauss Flayer weapons.
Common Openings
Artifacts
As most 1v1 games end before T2.5,I tend to choose all my 3 spells before T3 to beef up the lord & then delete the Forbidden archive to get some useful power resource back to do as i wish.Even if I do rarely make it to T4 its hard to justify the cost & usefulness of later spells like veil of darkness that can easily be countered by stealth detectors & ressurection orb in which Tomb Spyders in comparison do a better job anyway in producing extra troops past the squad cap limit & at full health as well as not taking up a valuable artifact slot.
Personally I go for solar pulse,phase shift & phylactery to make the Lord practically invincible as he can regain health faster as well as taking less damage from ranged fire as he inevitably leads from the front.
T1 to T4 General Strategy Play

Necrons possess a weak early game mechanic as they are already crippled with only one production structure to build all available scarabs and forces within a critical time window.This can be countered by sending scarabs out first to the enemy's HQ to get the first harasses in as they can decap, LP up and LP2 on points and turret harass thus buying the Necron much needed Monolith production time.It is how it is with the all the other factions fighting Necron, they have early map domination and the economy boosts that derive from it and the extra time advantage to rush a few squads to the Monolith compared to a couple of NW squads just barely coming out of the Monolith.Thats why its best not to be too greedy when queuing up scarabs and mindlessly leaving NWs on auto-reinforce as build time penalties add up with every fresh additional NW squad and NW unit out on the battlefield.
After driving back the initial rush, gather a few squads of NWs to set up the "wall of death".March the horde of NWs across the map towards the enemy's HQ whilst maxing out the population cap to full capacity.Support the main force of NWs with a mix of reinforced FOs, Wraiths and the NL causing havoc.Any scarabs brought along for the trip can build turrets to help take down enemy infantry/structures a bit faster.Or the scarabs can take the enemy points, further increasing the Necron build times and wasting the enemy's time in recapturing the points back.
Necrons's T3 options are rather limited compared to other factions.Now you can use Pariahs to spearhead your attack.Having plenty of power stored supports the Pariahs high reinforce speed thus making them hard to kill.Their tankiness lets them tie up heavy infantries especially against Grey Knights or Possessed marines or even a vehicle.
As with regular Destroyers, Heavy Destroyers work well when massed in groups.However it will cost around 1k in power just to get a few of them.Alternatively that huge amount of power spend could be used to advance a tier by assembling an Energy Core.Its your choice.Heavy Destroyers are much weaker when compared to other factions main tanks.Instead of sending Heavy Destroyers to drop and die against enemy combatant tanks, direct them to raid on LPs and other soft structures while you are distracting your opponent with your main army.This tactic will slow down their econ and force your enemy to split up his army to save his structures.
At the end of this tech tree you have a few options to either choose the Nightbringer, Deceiver or the Restored Monolith.Lets begin with the Nightbringer.If you see a 2-legged relic unit strolling about out on the battlefield, then moving the NL to shapeshift into the Nightbringer right next to the BloodThirster or Avator of Khaine is a must.The Nightbringer can be summoned at your opponents base to destroy a production building or take a huge chunk of health off their HQ.
A frowned upon tactic if you opt for the Deciever is to instantly port the fake Restored Monolith to your opponents HQ together with a huge army of NWs or even better Immortals to suddenly destroy their HQ.What is devastating about this move is it is practically unstoppable and is just as cheesy as Sm's tactic of porting successive waves of dreadnoughts to the target HQ.Sudden sneaky Fire Dragon or Vespids raids in the flicker of an eye on LPs and gens are common acceptable strats used by respective Eldar and Tau players.HQ smash tactics are acceptable if the intended victim is given enough time to see the attack coming across the land to scrabble back and respond accordingly.
The Deceiver also has the abilty to steal hero units permanently and turn squads temporarily.As wonderful as this ability is it can backfire on the necron player.There is a bug where if the smart player sees the elite squads "decieved" he can queue up another squad of elites at his rax.When the ability wears off, his elite squads will be returned to him as well as another squad of elites fresh out of the rax.I guess this is a nod to the OG DoW when you can micro a couple of IG's Kasrykins or Chaos Obliterators
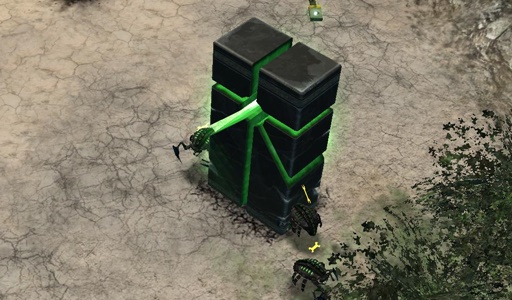
When you get the Restored Monolith out, always support it with anti-tank immortals and heavy destroyers.A Restored Monolith all by itself will quickly collapse to your enemy's heavy tanks.Send as many scarabs from your base as you can spare to the rear of the Monolith to continously repair it as a smart opponent will target your builders.The Restored Monolith also acts a forward mobile production building.So always keep its production queue busy pumping out squads, Destroyers etc.
The Lord Destroyers can be used to deal with opponents vehicles by disabling them in stasis & stealing them.Even stealing a regular transport vehicle and loading NWs into them is possible.You can also use stasis on armies to stop their heavy fire for a brief period while your necron army is free to destroy buildings.
Final Tips
When venturing online and joining apparent casual noob friendly games, you may end up getting outplayed and "rekt" against experienced veterans.I advise you to beat skirmish on insane difficulty,then download the DOW SS AI skirmish mod & also lose repeatedly beat that on insane difficulty.Also watch a bunch of replays from well known expert players.Pay attention to their starting builds evolving and specific choice of units to deal with each threatening unit.An example would be faction bosses meleeing machines to the junkyard when they are out of specialist anti-vehicle squads.Explore the automatch maps to their very edges as some maps contain hidden areas as well checking out the layout and major contested points.
Also if you have all the expansion packs/DLCs, play all of the 9 races so you can get an idea of the relative strengths & weaknesses of all the units.
To boost your reaction times further,try changing all the hotkeys to a more comfortable grid keys setup.This is done by editing KEYDEFAULTS.lua in Profiles\Profile1\dxp2 in your Soulstorm folder.Make a backup of KEYDEFAULTS.lua before any changes of key bindings.Also you can assign any units,production buildings up to ten control groupings from one to zero on the keyboard as long as your fingers can stretch that far.Its worth noting, you can set the assignings to a primary builder, specialised squads, power and resource globals or even your distant LP where the combat action is likely to happen.The truth is that disciplined practice and numerous battle hardened games is required to compete against the regular hard core players still remaining in this great game.
The reality is, an elitist culture exists among the more competitive players where the experts tend to play aggressively to dominate and pressure you from the get go.This is not surprising as the game is designed such that any initial accumulated advantages gained and maintained usually snowballs into a crushing victory.Having masterful "actions per minute" aka APM skills to keep on top of your micro and macro can be the winning difference when unstoppable and immovable large armies collide.However smart thinking strong players also somehow,someway have quick reflexes and immediate transitions to peak APM to face whatever critical situations they encounter.That is just one of many performance metrics in your pile in which to judge yourself against.Another one is analysing the stats screen at the end of a game and mentally roughly working out your kill-death ratio commonly referred to as KDR from the approriate figures given.Funnily enough, the exception to a good KDR is that Necrons and Orks can still win games by purposely or carelessly losing more units than they actually kill.For the reasons that Necrons and Orks can pump out wave after wave of "free" troops to be used as a meatshield while the rest of the army cleans up.In addition, Necrons can also sacrifice more "free" troops by ressurecting them with the Necron Lord or by the Tomb Spyder.That is pretty much that for now,anyhow more importantly just enjoy & have fun!
Version draft 3.30 September 2011
Version draft 4.10 July 2017 changelog: dead links removed, updated revisions.
Version draft 4.20 June 2019 changelog: banner, navigation cosmetic alterations,very minor content revisions.
Version draft 4.30 Sept 2019 changelog: images resized, replays converted to v1.3, YouTube video added, more to come in the future
Version draft 4.40 Oct 2019 changelog: images resized, all replays uploaded to Youtube
Legal information:
All Warhammer 40,000, names, descriptions, are trademarks of or copyrighted by Games Workshop Ltd.
Disclaimer:I am no way authorised by or connected with THQ or Relic,I am just providing information
which I hope fans will find useful.
This guide may be distributed and copied freely, in its entirety, for personal use.
All original author and copyright information must remain intact.
The views and opinions expressed within this site are those of the specified author.
This document is the sole intellectual property of clutterfumble.
Any sales or other uses of this document are expressly forbidden, without the specific consent of the author.